
In the previous blogpost ‘Sitecore XM Cloud Forms – A first look‘ I had a first look at the features of Sitecore XM Cloud Forms. This second blog-post is on webhooks integration with your form.
What are webhooks?
Before we see the webhooks integration in action, let’s first have a look at what webhooks are:
A webhook is a mechanism that allows one system to notify another system about events or updates in real-time.
In terms of Sitecore XM Cloud Forms the webhook basically defines the destination for the form data that will be send upon form submission. You can connect to a third-party product, such as Sitecore Connect or Zapier, in order to create workflows.
So how can we quickly setup something simple (without the need of integrators like Sitecore Connect or Zapier) so we can see how the data gets send? Let’s have a look at that.
Webhooks testing platforms
There are several webhook testing services available that can help us test our webhook implementations. Here are some popular ones: Webhook.site, RequestBin, Beeceptor and many more. In this blog-post I’ll use the first one: Webhook.site
Webhook.site is a web service that provides a simple and convenient way to test and inspect HTTP requests. It allows users to create a unique URL (a webhook endpoint) and then receive and view any HTTP requests sent to that URL
So let’s open up a new tab and access the Webhook.site website.
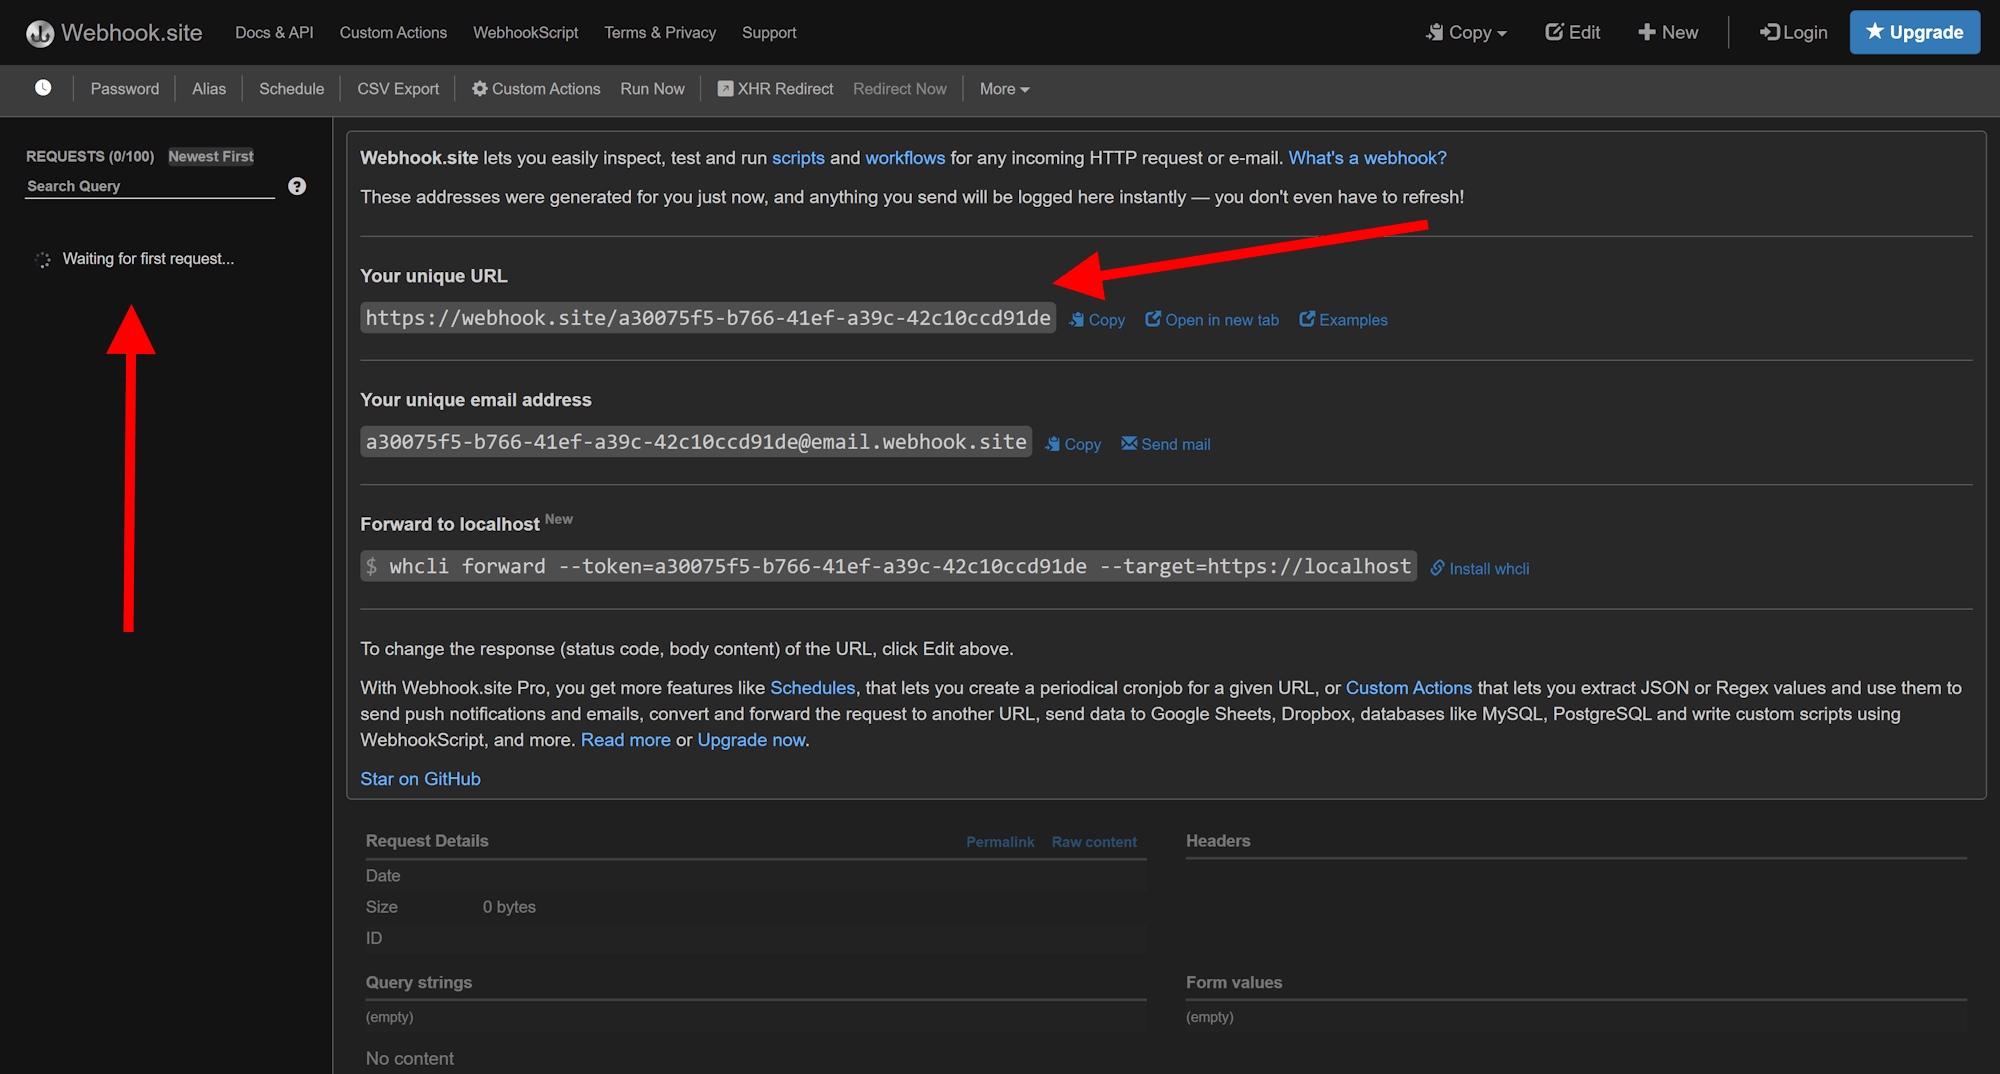
As you can see Webhook.site immediately starts listening to incoming requests. The webhook has a unique url which we’re going to need during our Webhook setup in XM Cloud Forms.
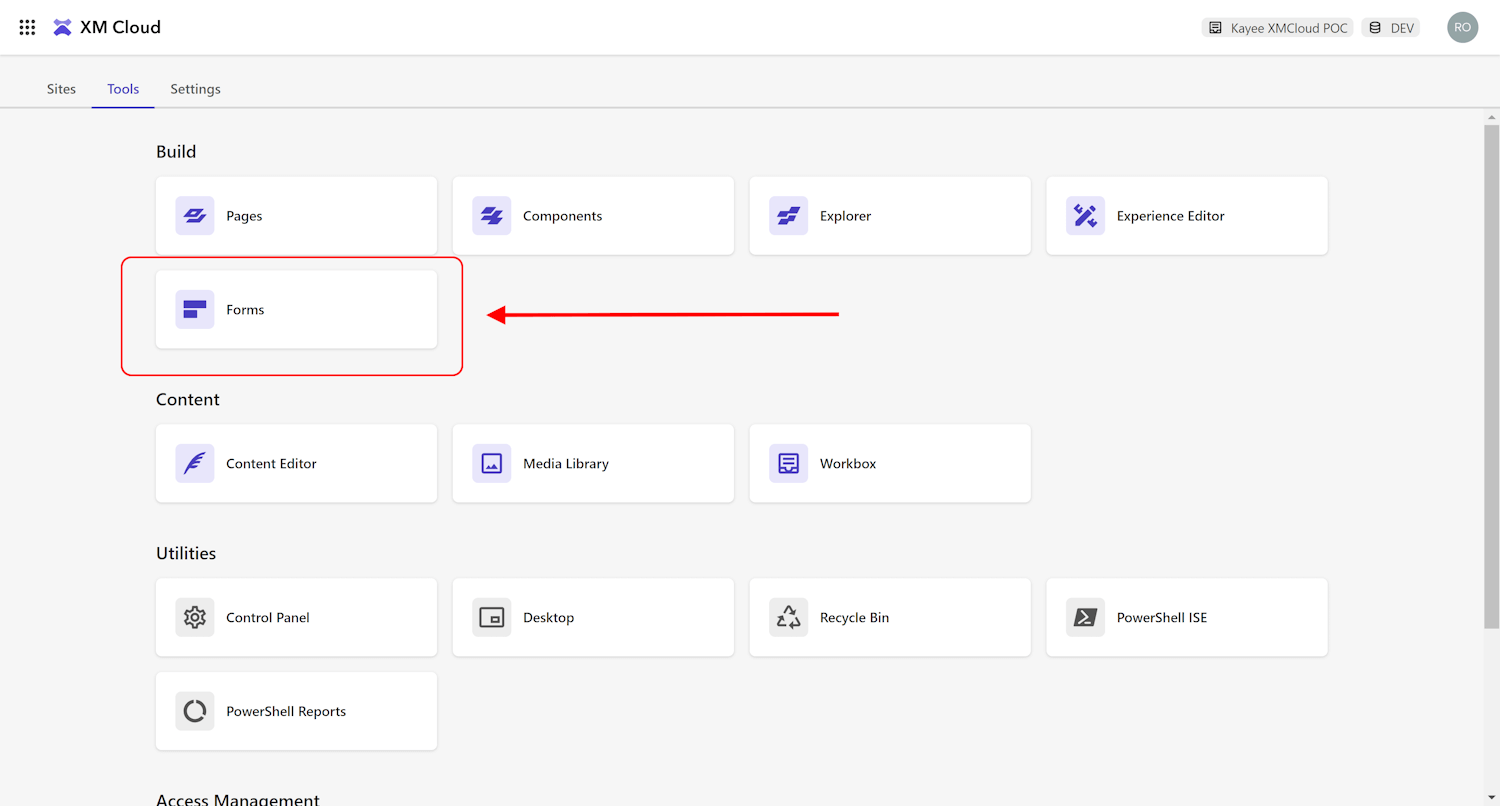
Let’s have a look on how we’re going to setup Webhooks in Sitecore XM Cloud Forms now. Open up the Forms Application from the Sitecore Launchpad:
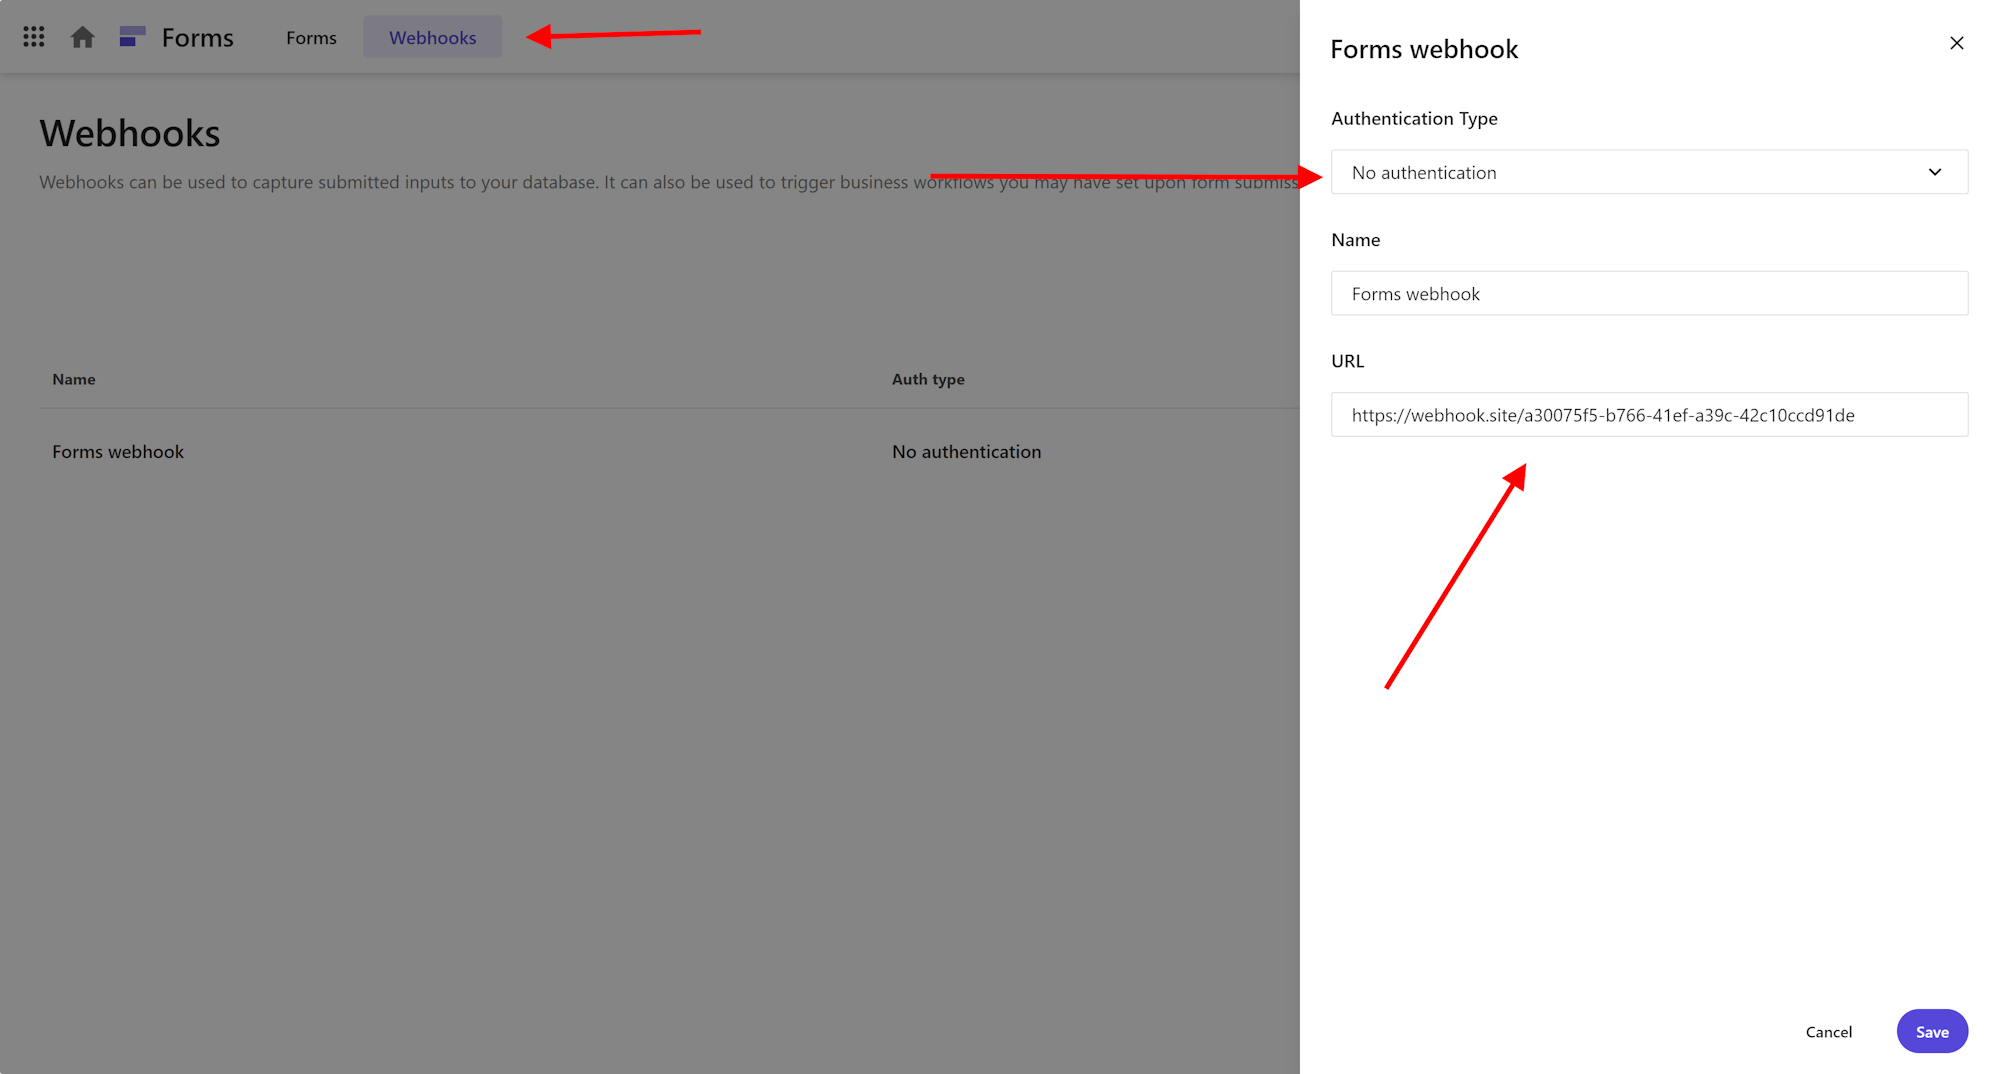
Now go to the ‘Webhooks tab’ and click the purple ‘Add Webhook’ button. A create webhook form will appear on the right. Since we’re testing a public open webhook service, we’re going to select ‘No authentication’ as the Authentication type, and we provide the unique url of the Webhook.site: https://webhook.site/a30075f5-b766-41ef-a39c-42c10ccd91de
Give the webhook a decent name and click the purple ‘Save’ button.
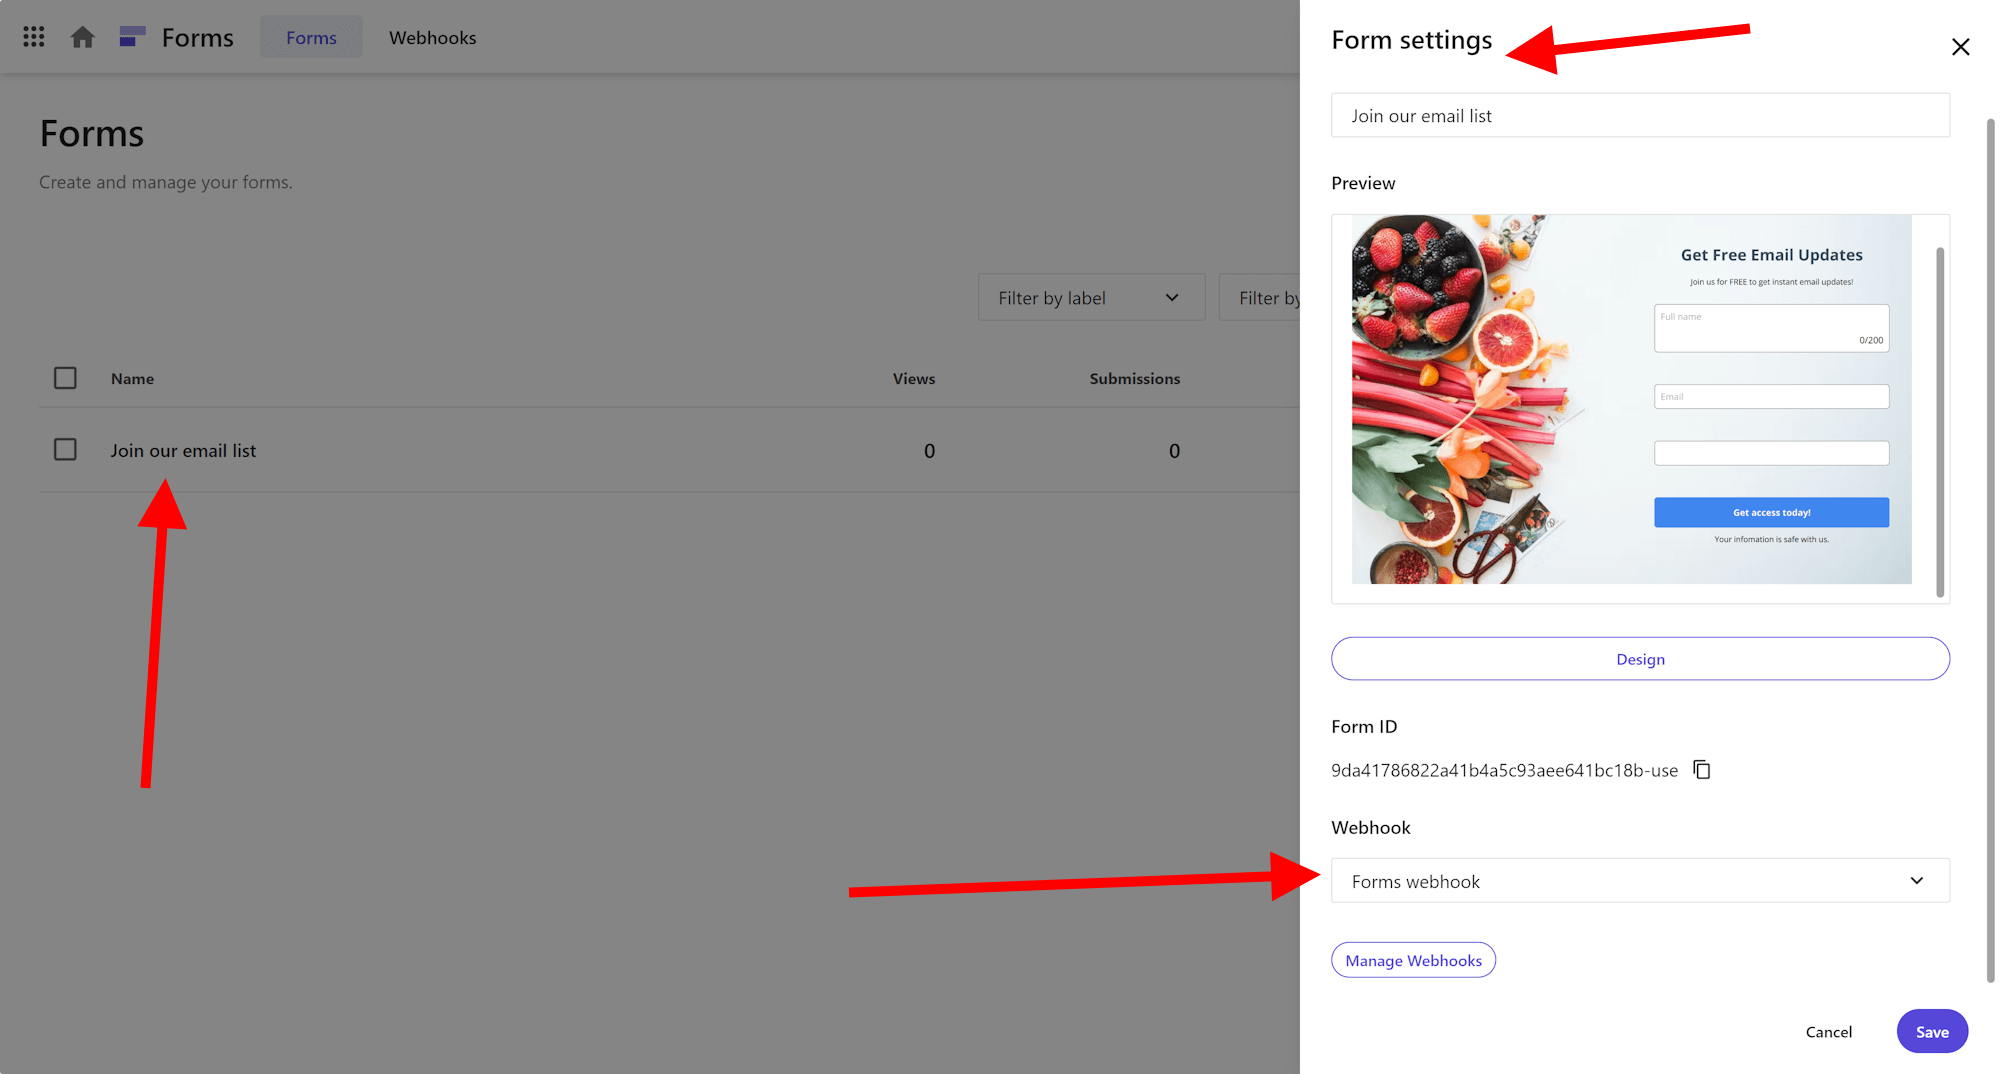
With that webhook setup, let’s go to the previous build XM Cloud Forms form, click on ‘Settings’ and connect the created webhook.
Open up the specific form, go to the ‘Settings tab’ and let’s now test the webhook.
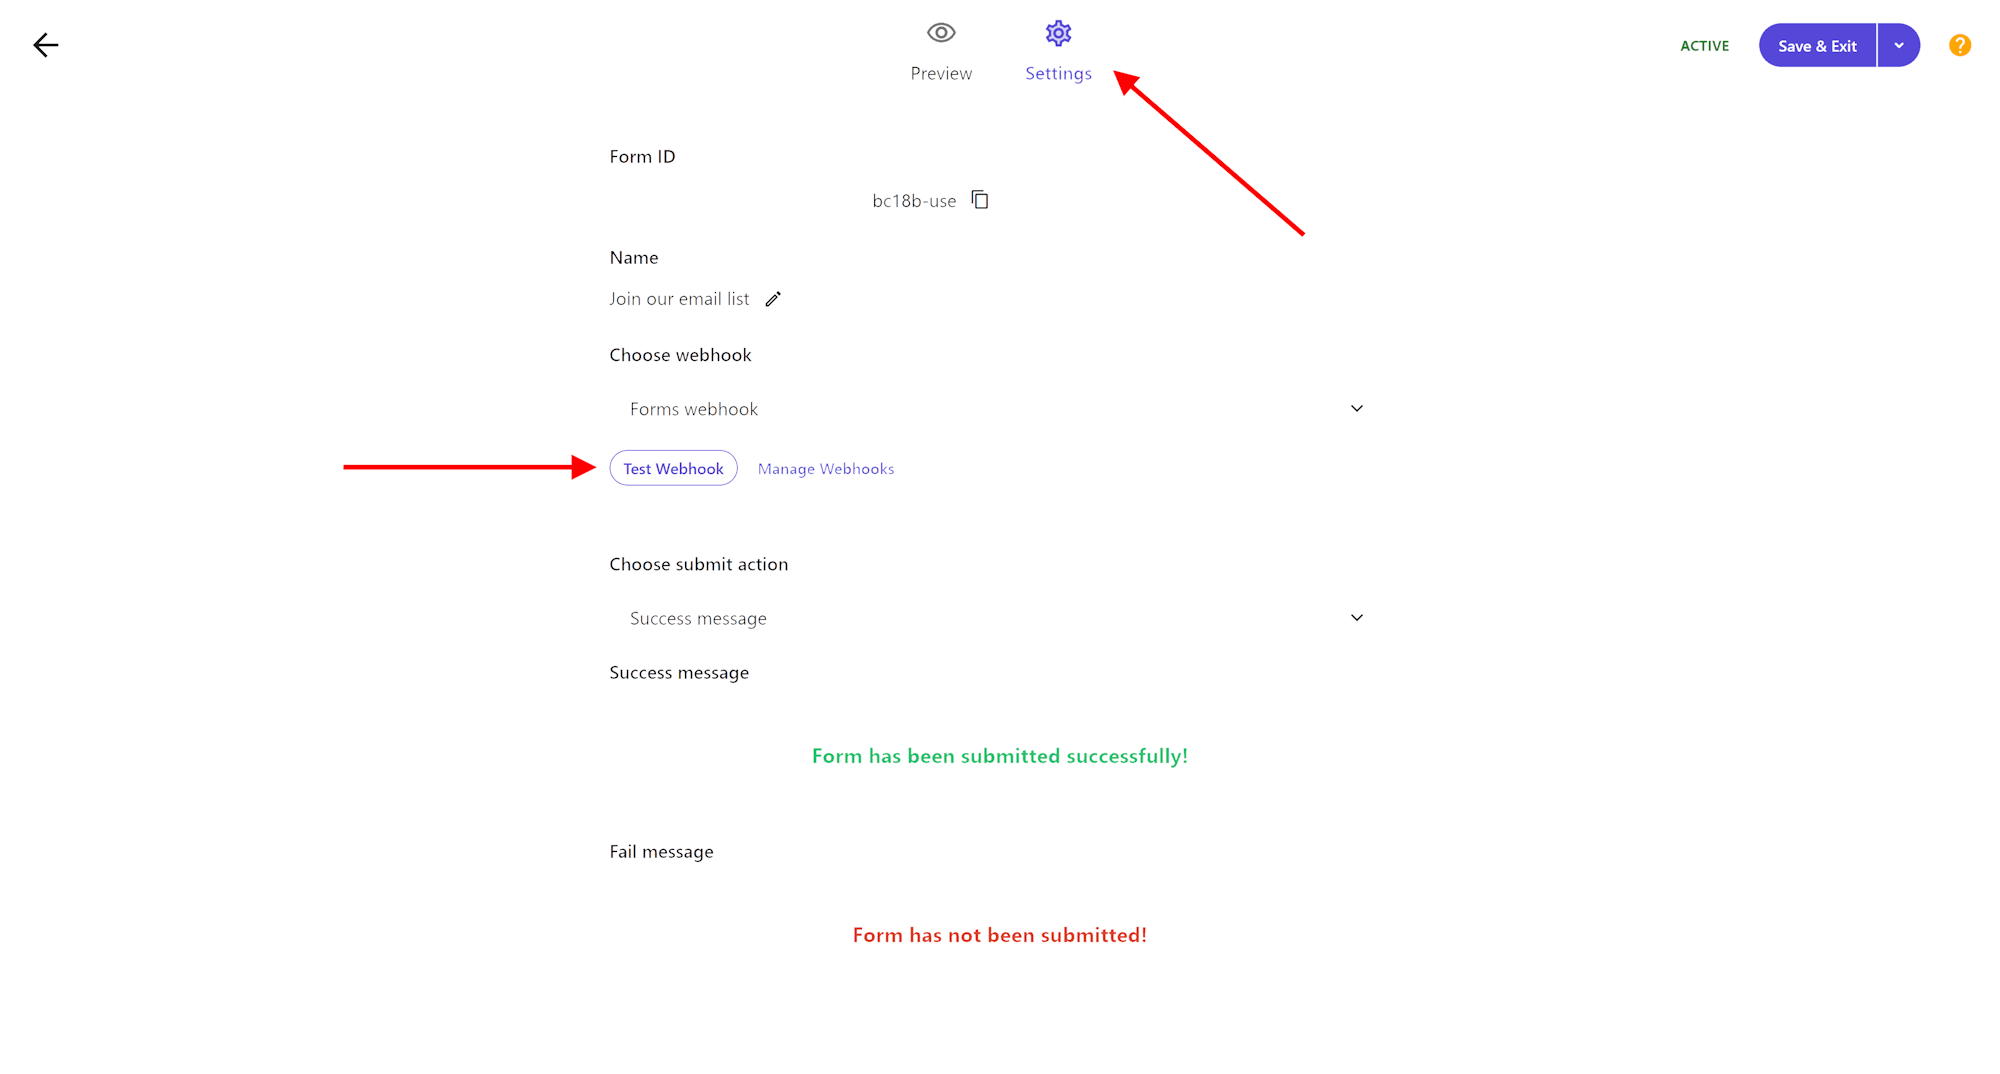
Hit the ‘Test Webhook’ button and the test screen appears with the specific form, fill in the form and click the blue ‘Get access today!’ button of the form.
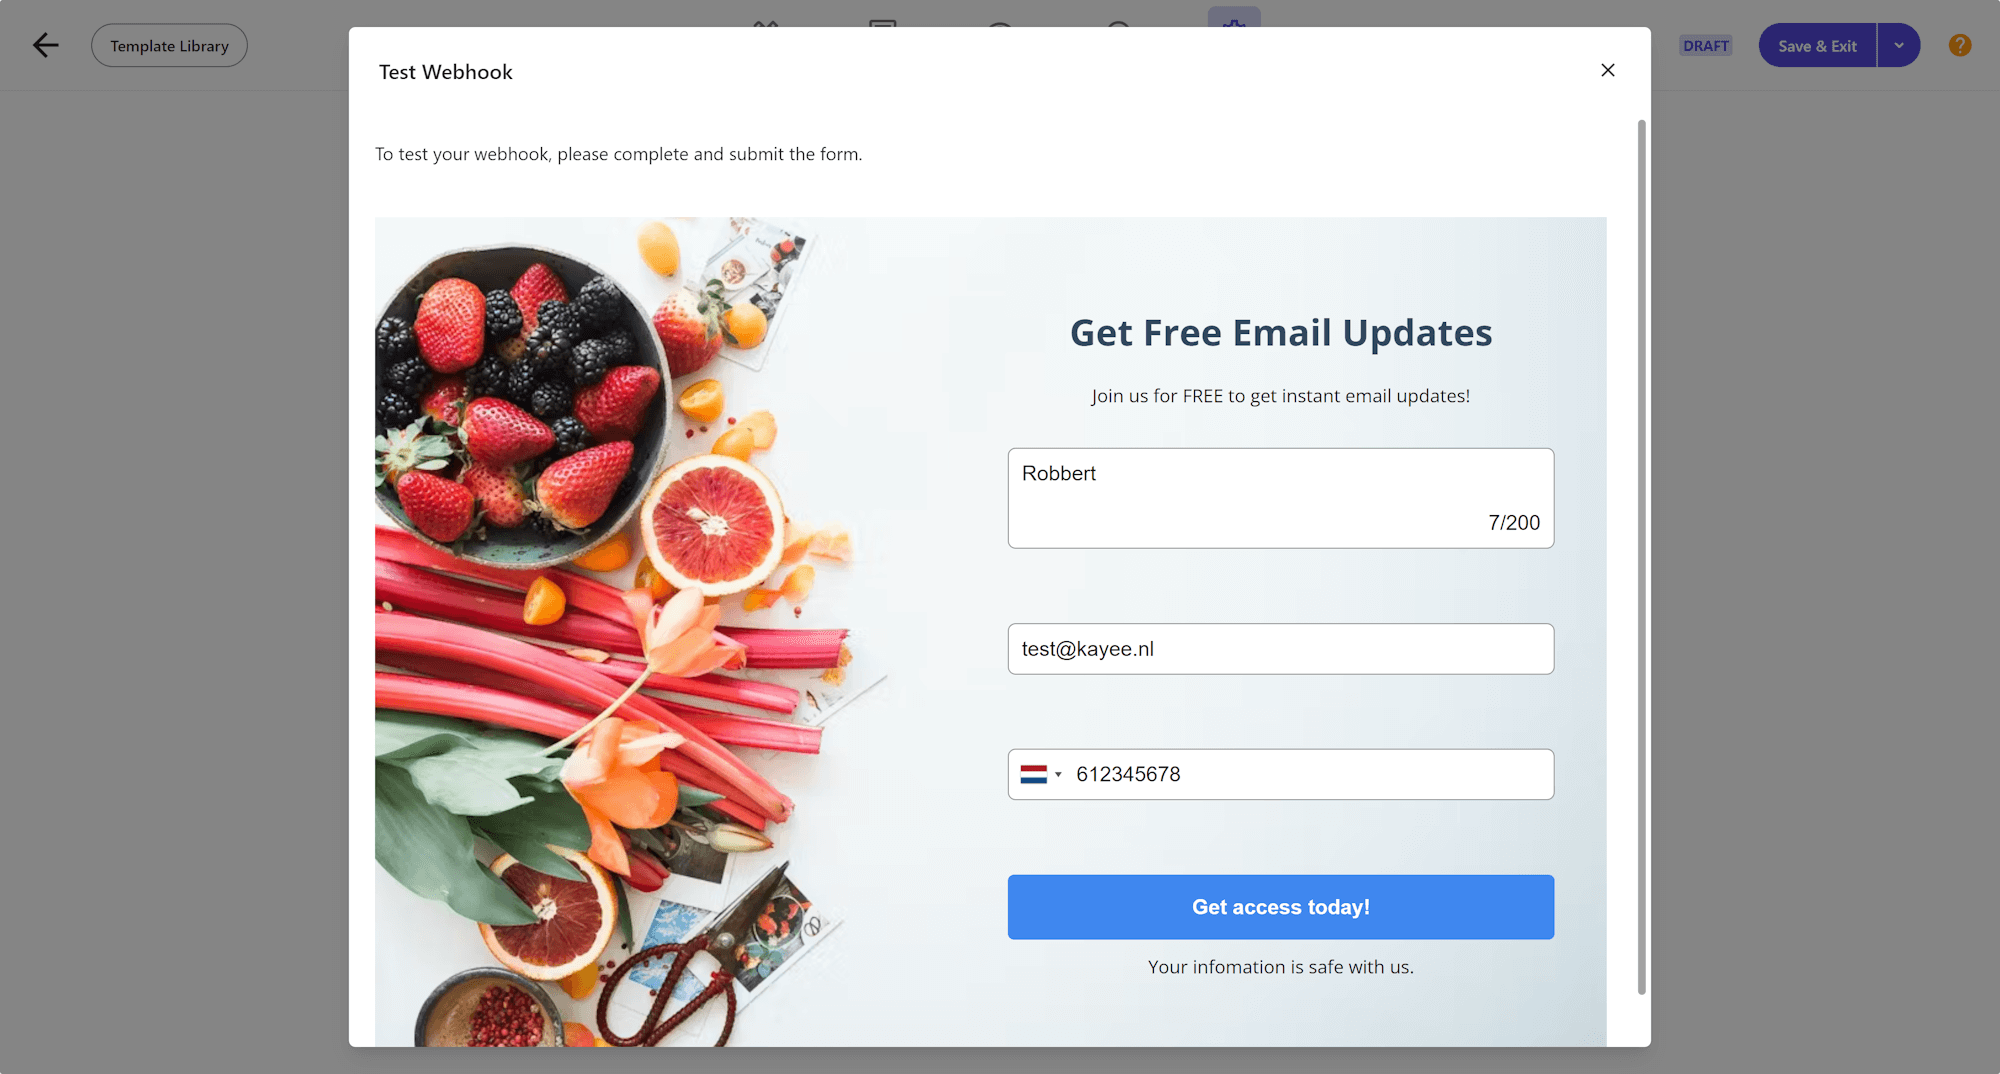
The webhook tester will then show a screen of the payload and request headers it’s sending to the webhook. Click on the bottom of this popup on Submit.

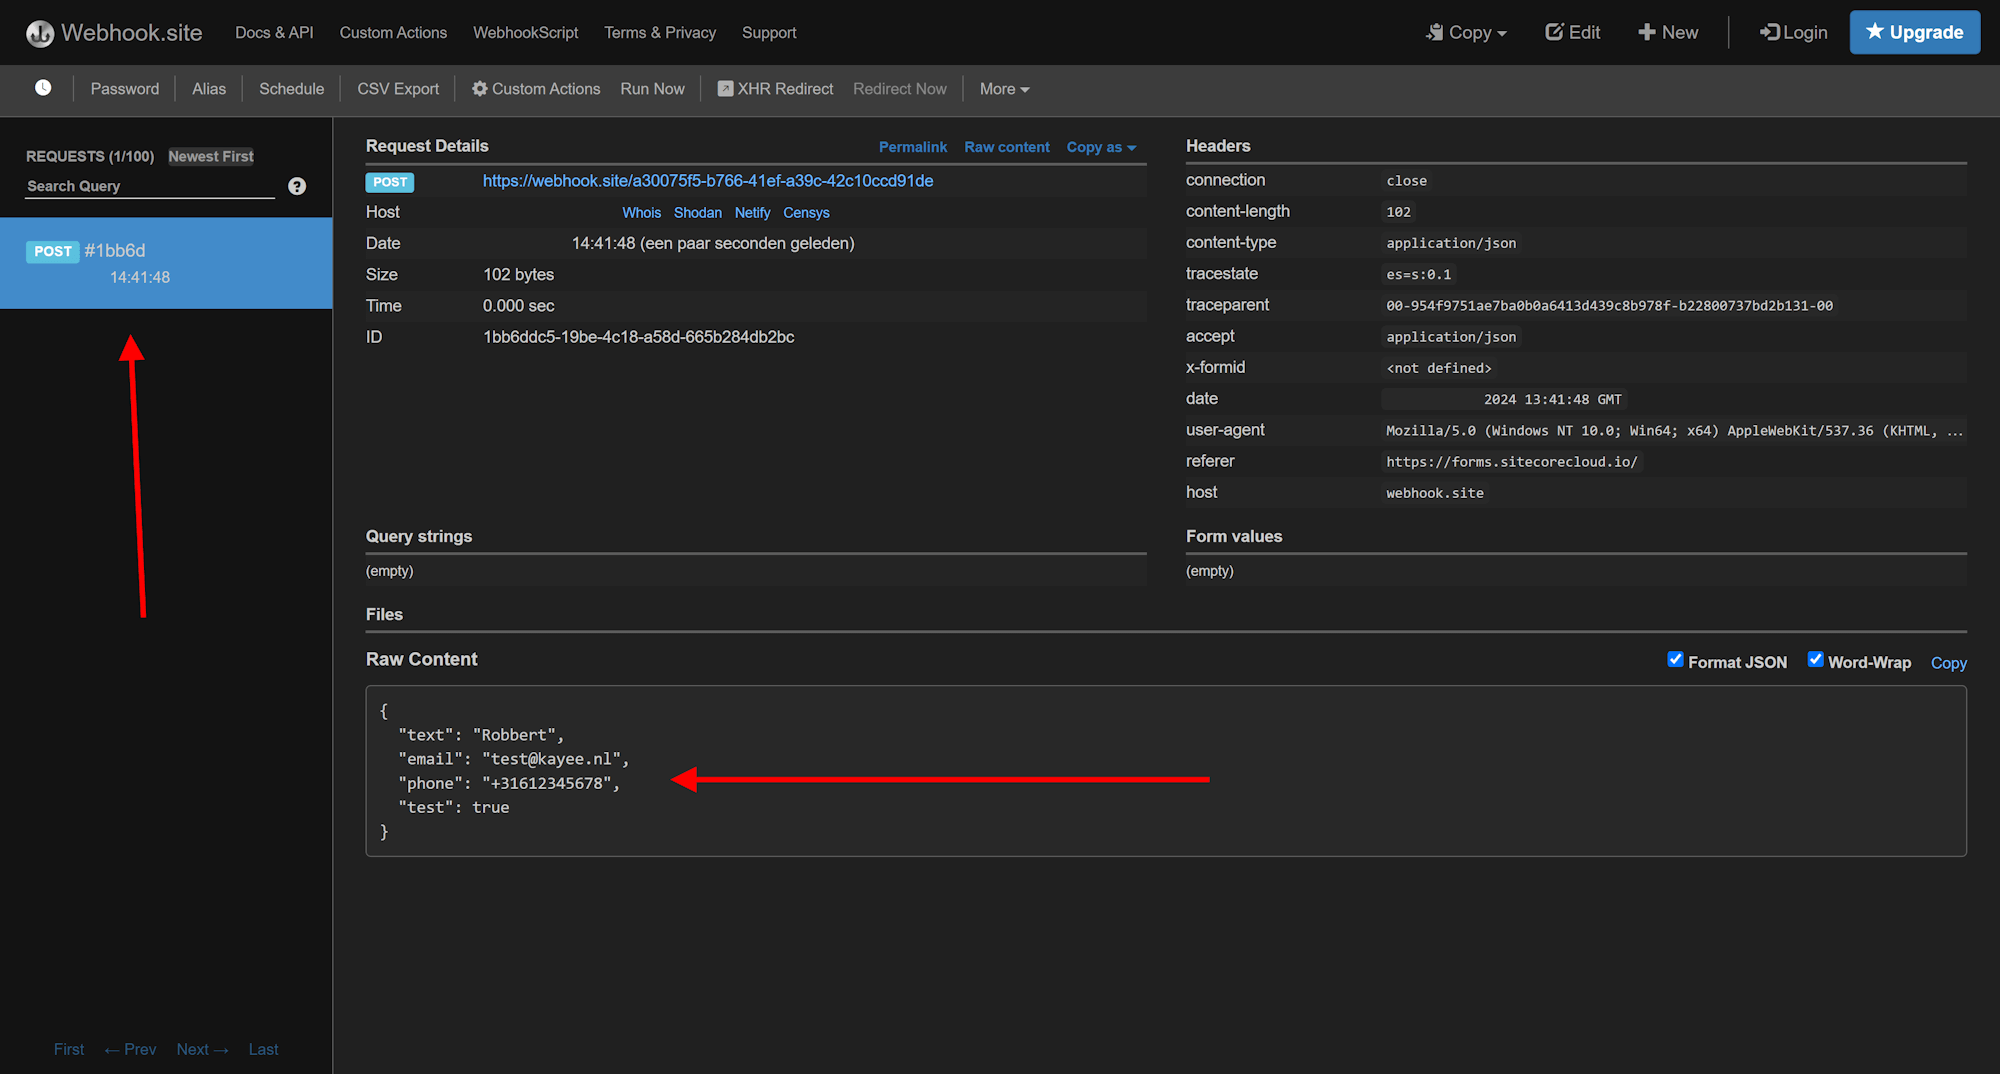
The form will be submitted and a request with the form data will be submitted to the configured webhook. In Webhook.site we can now see the request coming in.
And that’s it. That’s how easy it is to setup a webhook, and integrate it with Sitecore XM Cloud Forms.
In a real production environment of course you will not be using a public webhook testing service, but then will integrate with integration/workflow tools such as Sitecore Connect or Zapier, to immediately get the submitted data and get mails automatically send, have the data automatically stored in a CRM and much more.
Happy Sitecore-ing!
–Robbert


