As probably most of you guys know is that Sitecore has multiple open-source repositories, so that potential future clients, MVP’s and partners can setup the Sitecore Habitat Home demo site in order to demo the rich features and capabilities of the Sitecore Experience Platform.
Sitecore.HabitatHome.Utilities is one of those repositories out there (the other one is Sitecore.HabitatHome.Platform), and basically is a collection of useful utilities and script examples to help in the context of the Habitat Home Demos. It’s build by Sitecore’s demo team and needs to be used in order to install the complete Habitat Home Demo example (whether it’s the SXA Habitat Home demo or the integrated Sitecore Commerce 9 Habitat Home demo).
I’m not sure however if many people are aware that you can use the Sitecore.HabitatHome.Utilities repo to quickly install your own local Sitecore 9.1 sites with your custom host-names, without having to use the default SIF scripts from the Sitecore or use SIF-Less 2.X to install Sitecore 9.1.
In this blogpost I’m quickly showing you how to make use of these well thought out scripts.
Clone Sitecore HabitatHome Utilities repo
The first thing we need to do is clone the Sitecore.HabitatHome.Utilities repo, clone it to c:\projects\Sitecore.HabitatHome.Utilities.
Once that is done, we first need to make sure that the Sitecore 9.1 pre-requisites are installed, you can head over to the Prerequisites folder. Open up a PowerShell session as Administrator and run the following: .\Install-All.ps1, this will install SIF, IIS settings and will install SQL Server CLR types etc… but it will also install applications like: googlechrome, git, NuGet.CommandLine, 7zip, nodejs.install, vscode, vscode-powershell, vscode-csharp,jre8, snaketail, if you don’t need these (you need at least JRE8 for the SOLR install), you could go into the scripts to comment out the execution of Install-ChocoPackages.ps1 or uninstall through the Control Panel -> Uninstall a program.
With that in place, let’s setup SOLR version 7.2.1, which is needed for Sitecore 9.1.
Install SOLR 7.2.1
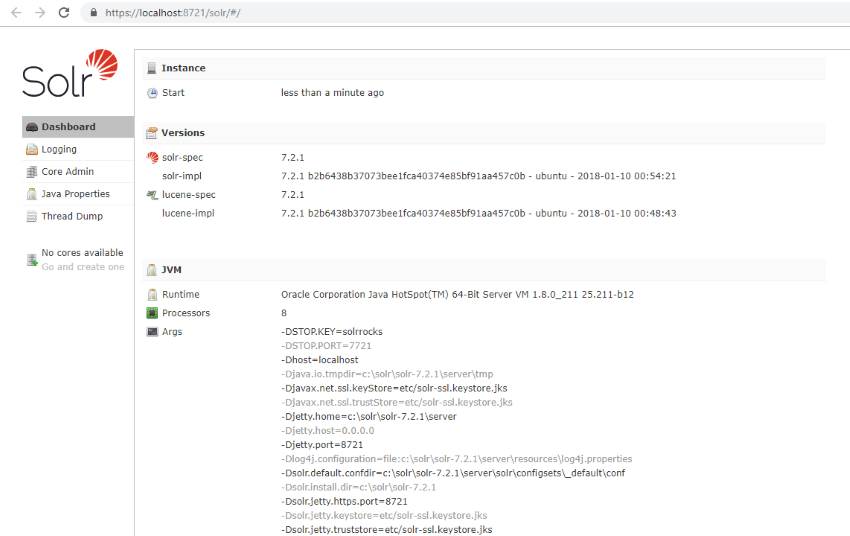
In the still opened Powershell Session, head over to the C:\Projects\Sitecore.HabitatHome.Utilities\XP\install\Solr directory and run the install-solr.ps1 script. The SOLR script will install SOLR as a windows service, through the use of the Non Sucking Service Manager. Head over to https://solr:8721/solr/#/ and see that SOLR 7.2.1 is running.
Set Installation Defaults and Overrides
Now that the pre-requisites are installed and SOLR is up and running. We need to so the following:
- Copy over the Sitecore license file
- Adjust set-installation-overrides to update the hostname that you want to use and update the SQL Server credentials.
- Run 2 scripts to generate the configuration-xp0.json, which will be used during installation.
- Run the install-singledeveloper.ps1 script to install the latest version of Sitecore 9.1, in this case: Sitecore 9.1.1 rev. 002459
So let’s go: Copy over your Sitecore License file to the following directory: \XP\install\assets.
Head over to the \XP\install directory and make a copy of set-installation-overrides.ps1.example and rename that to set-installation-overrides.ps1. Open that file up in your favorite text-editor (VS Code or Notepad++).
Make the following adjustments (site.prefix and hostName) on Line 21:
# Site Settings
$site = $json.settings.site
$site.prefix = “sitecore91”
$site.suffix = “dev.local”
$site.webroot = “C:\inetpub\wwwroot”
$site.hostName = $json.settings.site.prefix + “.” + $json.settings.site.suffix
$habitathomebasicBinding = [ordered]@{
hostName = “sitecore91.dev.local”
createCertificate = $true
sslOnly = $false
port = 443
}
Even though the variable is still named as habitathomebasicBinding, it’s just a name and doesn’t matter. The 9.1 website will be created with your siteprefix and hostname.
Head over to line 64 and adjust the following configuration:
$sql.server = “[YOUR SQL SERVER NAME]”
$sql.adminUser = “SQL ADMINUSER”
$sql.adminPassword = “SQL ADMINPASSWORD”
Provide your SQL Server name and admin user (you need to have set this up first before doing an installation).
With that in place we can head over in the Powershell Session to the \XP\install directory. Run the following scripts in the following order:
- set-installation-defaults.ps1
- set-installation-overrides.ps1
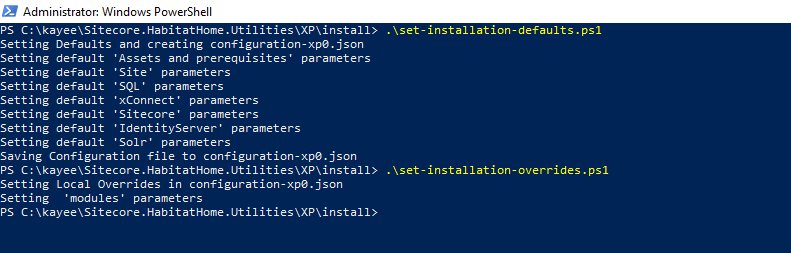
The above execution of the Powershell scripts generated a configuration-xp0.json file in the \XP\install directory, which contains all your configurations that the Install script needs in order to install your desired configuration.
Now we’re ready to start the installation. For now the whole configuration process might have cost us about 5-10 minutes (especially if you get used to this, this will save you hours of time to quickly spin up a new Sitecore instance).
In Powershell, let’s run the following script that actually does the installation: install-singledeveloper.ps1
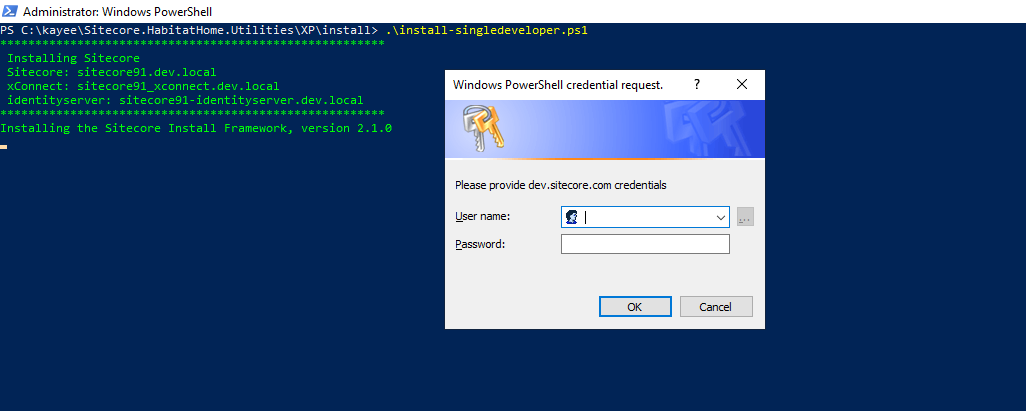
As you can see in the screenshot above, the Powershell script will automatically ask you to login with your Sitecore credentials of dev.sitecore.com, in order to download the Sitecore 9.1.1 rev. 002459 (WDP XP0 packages).zip to the \XP\install\assets folder. This might take a while. In the end the whole script will run for about 15 minutes

Head over to https://sitecore91.dev.local/ to see the default Sitecore website, where you develop against. So if you’re a lazy developer, and don’t want to use the default scripts, configure them or use SIF-Less, you can always use the Sitecore.HabitatHome.Utilities repo to install your local custom hostname contained Sitecore 9.1.1 instance.
Run uninstall-xp0.ps1 to uninstall the whole site, which cleans up the xConnect services, IdentityServer etc…

The Sitecore.HabitatHome.Utilities repository also contains a way to install certain modules like: Sitecore PowerShell Extensions, Sitecore Experience Accelerator, Data Exchange Framework, JavaScript Services, etc….
In a future blog-post I will dive into that installation.
In the meantime, Sitecore is busy with releasing a video series on Installing Sitecore with Habitat Home Utilities. Check it out for a more visual learning way.
Happy Sitecoring…


