In the past few weeks I’ve been looking at Sitecore XM Cloud BYOC, which stands for ‘Bring your own components’. If you haven’t checked out my 2 previous blogpost I would like to urge you to read them:
- A first look at Sitecore XM Cloud BYOC
- How to Build a Great UI for your Sitecore XM Cloud BYOC Components
In today’s blogpost I want to explore validation on Sitecore XM Cloud BYOC components.
Required fields validation
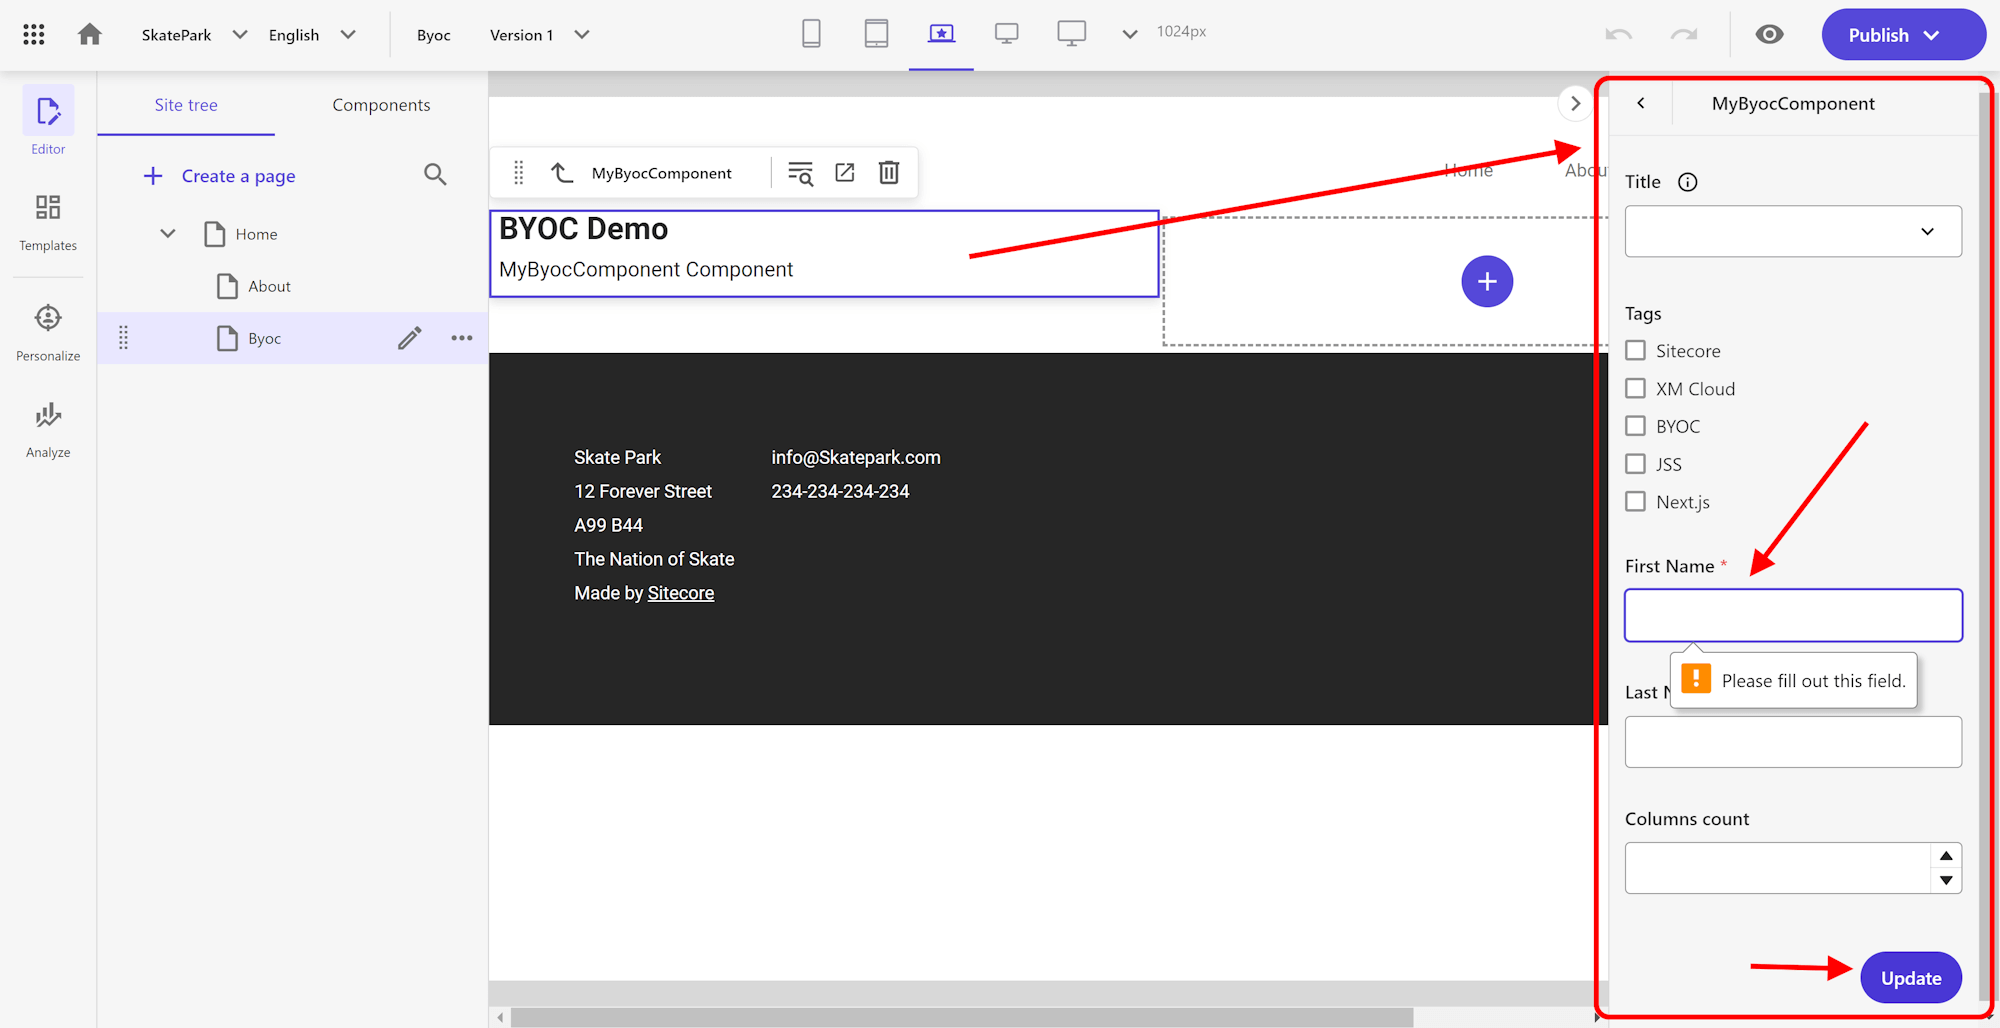
Let’s start with the first validation, the validation of required properties/fields in the BYOC configuration. We can specify which properties are required using the ‘required’ attribute. Let’s continue with my previous blogposts’ configuration and make the ‘firstName’ and ‘lastName’ properties/fields required:
This will result into the following validation when the content author in the end clicks the purple ‘Update’ button:
Min & Max Length validation
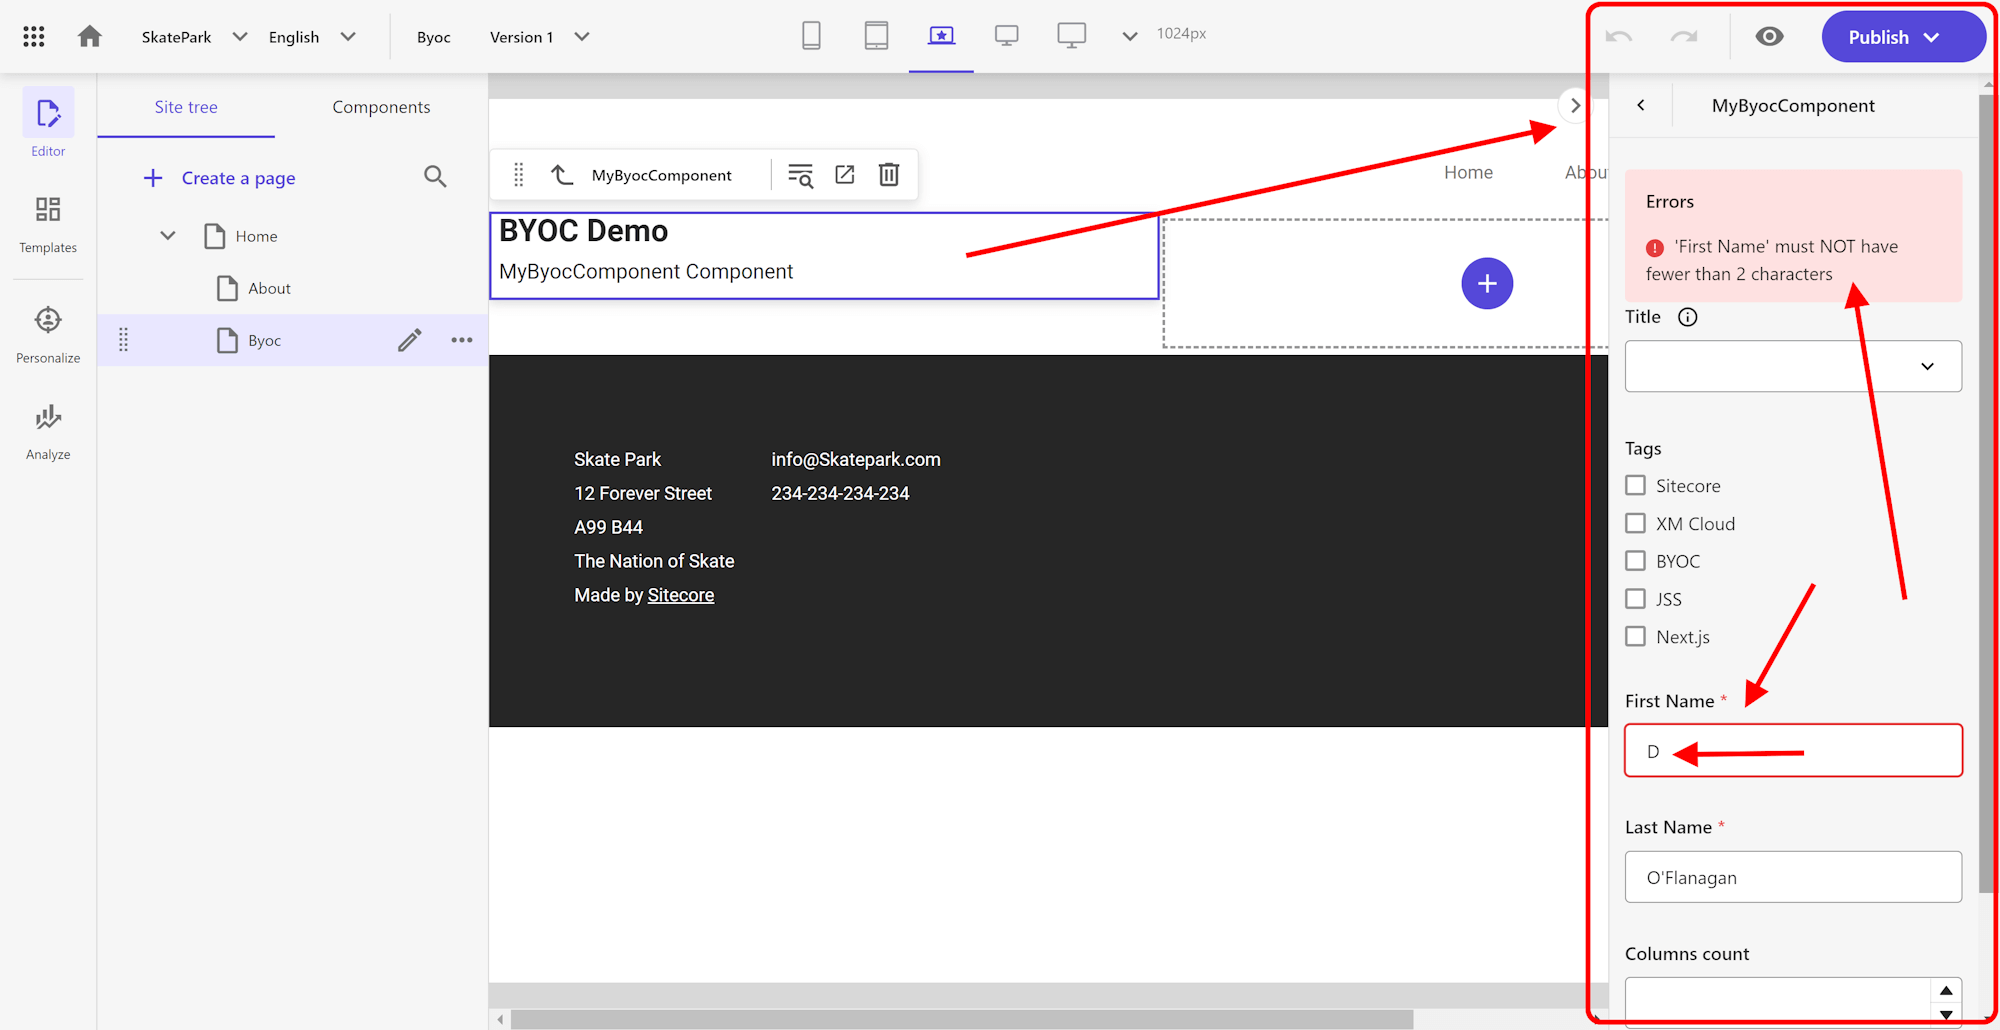
We can use ‘minLength’ and ‘maxLength’ attributes/keywords to control the length of string fields/properties and the interval the values needs to fall into. So let’s configure the ‘firstName’ property/field to now have a minimum length of 2 and whose maximum length is 50:
When we now fill in for example only ‘one’ character in the ‘firstName’ field and click the ‘Update’ button, we can see the validation kicking in and see the validation output all the way on top of the right-hand side panel:
Numeric validations
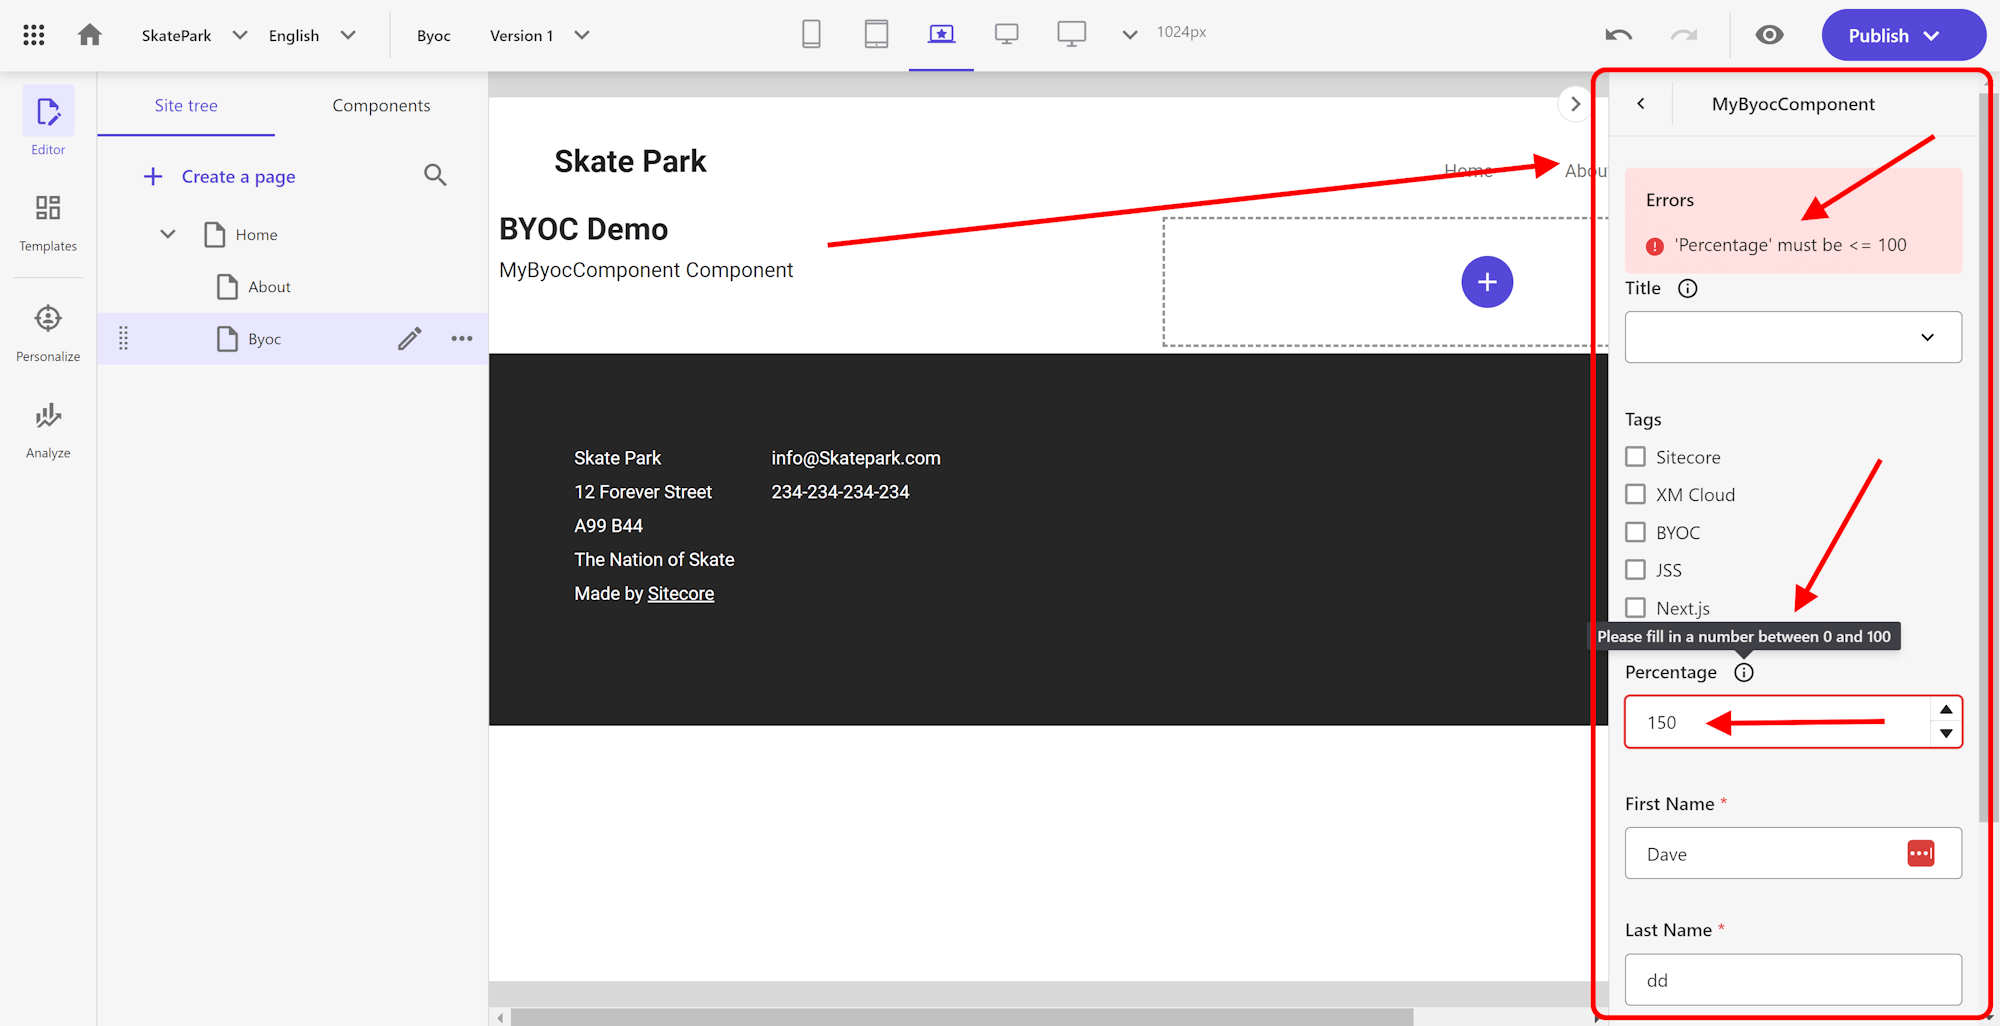
Let’s check out numeric validations. Let’s create a ‘Percentage’ property/field that only allows for 0 until 100 for allowed values. We’ll end up with something like this:
We use the ‘minimum’ and ‘maximum’ keywords for an ‘integer’ property/field. So when we now fill in a numeric percentage of like ‘150’, we’ll get the following validation:
Array validations
In the above screenshots you’ll probably see the ‘Tags’ checkboxes, but there’s no validation associated with this property/field. Let’s add some validation to it. When we mark the ‘Tags’ property/field as required, we’ll end up with a message on the first option of the checkboxes that says: ‘Please check this box if you want to proceed’.
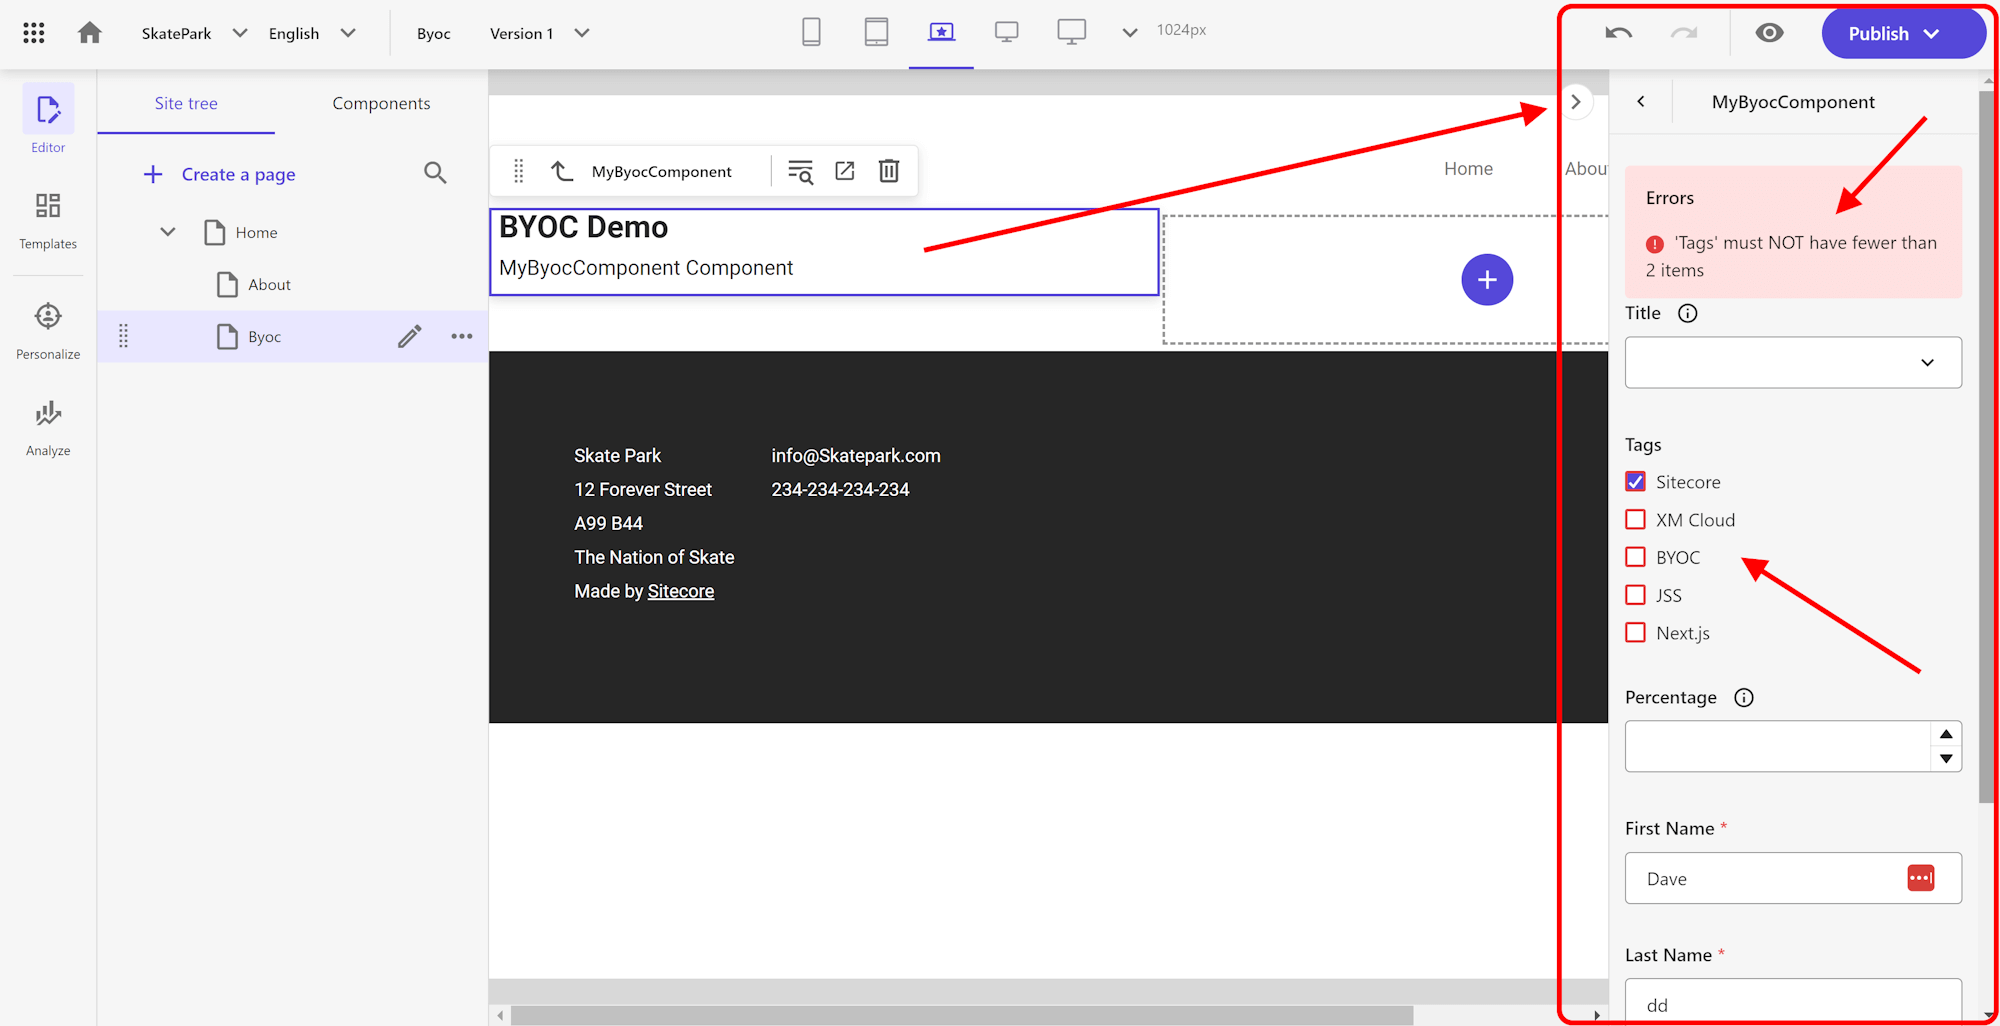
We can also not make it required by configuring it that at least 2 checkboxes need to be configured, so let’s now configure that at least 2 Tags should be checked. We do this by configuring the ‘minItems’ property/keyword at 2:
So with this the validation is like this for the ‘Tags’ checkboxes:
And that concludes the basics of validation (required fields, min/max number length, min/max number of items in arrays, etc…) on BYOC components.
Hope this helps once more in growing your understanding of the capabilities of BYOC.
Happy Sitecore-ing!
–Robbert