During my summer holiday Sitecore released their new version of their Digital Experience Platform: version 9.2. While most install Sitecore 9.2 blog-posts immediately popped up, I kinda missed the train ;-).
This will be my first blog-post on Sitecore 9.2 and in this blog-post I will introduce you to a new Sitecore demo site called: Habitat Home Corporate, which was just released a couple of days ago by the fantastic demo team.
The Habitat Home Corporate site and the tools and processes in it, is a Sitecore® solution example built using standard Sitecore MVC on the Sitecore Experience Platform™ (XP) following the Helix architecture principles.
It’s one of the Habitat Home examples and this one doesn’t require SXA, Commerce (like Habitat Home Platform), but is using plain old Sitecore MVC.
Let’s get started on how to install this brand new demo site which will look like the following:

Sitecore 9.2 installation first
If you’ve read my previous blog-post on Using Sitecore HabitatHome Utilities to install Sitecore for your own sites, you’ve probably noticed that I’m a big fan of the way the Sitecore demo team has set up the Sitecore Habitat Home Utilities repo, which contains a collection of utilities and script examples to help with installing the Sitecore Experience Platform, installing Experience Commerce, installing Sitecore Modules etc…
Let’s use it for installing Sitecore 9.2 (on top of which we’re going to install Habitat Home Corporate later on).
Clone the Sitecore.HabitatHome.Utilities repo
So head over to GitHub and clone the repo to for example: C:\projects\Sitecore.HabitatHome.Utilities.
Install pre-requisites
Make sure you have all the pre-requisites installed so you can successfully install Sitecore 9.2 (if you haven’t, open up a Powershell prompt in admin mode, and head over to the pre-requisites directory: C:\projects\Sitecore.HabitatHome.Utilities\Prerequisites. Run the Install-All.ps1 Powershell script, that will make sure that all the necessary tools like urlrewrite, iis features get installed. (see also my previous post for instructions: Using Sitecore HabitatHome Utilities to install the latest Sitecore 9.1 for your own sites)
Install SOLR 7.5.0
Get SOLR 7.5.0 installed (which is the upgraded version for Sitecore 9.2), in Powershell, head over to C:\projects\Sitecore.HabitatHome.Utilities\XP\install\Solr and run the install-solr.ps1 script. This will get you SOLR 7.5.0 installed as a service through the use of NSSM.
Set installation defaults and overrides
Now that the pre-requisites are installed and SOLR 7.5.0 is up and running, we can do our local environment configuration adjustments. What we need to do are the following steps:
- Copy over the Sitecore license file
- Adjust set-installation-overrides to update the hostname that you want to use and update the SQL Server credentials.
- Run 2 scripts to generate the configuration-xp0.json, which will be used during installation.
- Run the install-singledeveloper.ps1 script to install the latest version of Sitecore 9.2, in this case: Sitecore 9.2.0 rev. 002893
So let’s go: Copy over your Sitecore License file to the following directory: C:\projects\Sitecore.HabitatHome.Utilities\XP\install\assets.
Head over to the \XP\install directory and make a copy of set-installation-overrides.ps1.example and rename that to set-installation-overrides.ps1. Open that file up in your favorite text-editor (VS Code or Notepad++).
Make the following adjustments on line 3:
[string] $prefix = “habitathomecorporate”,
Head over to line 46 and adjust the following configuration:
$SqlSaPassword = “[YOUR SQL ADMINPASSWORD]”
$sql.server = “[YOUR SQL SERVER NAME]”
$sql.adminUser = “[YOUR SQL ADMINUSER]”
Provide your SQL Server name and admin user (you need to have set this up first before doing an installation).
With that in place we can head over in the Powershell Session to the \XP\install directory. Run the following scripts in the following order:
- set-installation-defaults.ps1
- set-installation-overrides.ps1
The above execution of the Powershell scripts generated a configuration-xp0.json file in the \XP\install directory, which contains all your configurations that the Install script needs in order to install your desired configuration.
Now we’re ready to start the installation
Installing Sitecore 9.2
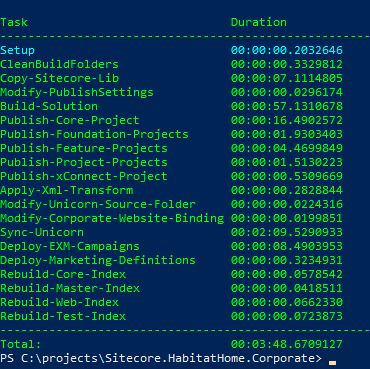
Now we’re ready to start the installation. For now the whole configuration process might have cost us about 5-10 minutes. In Powershell, let’s run the following script that actually does the installation: install-singledeveloper.ps1.
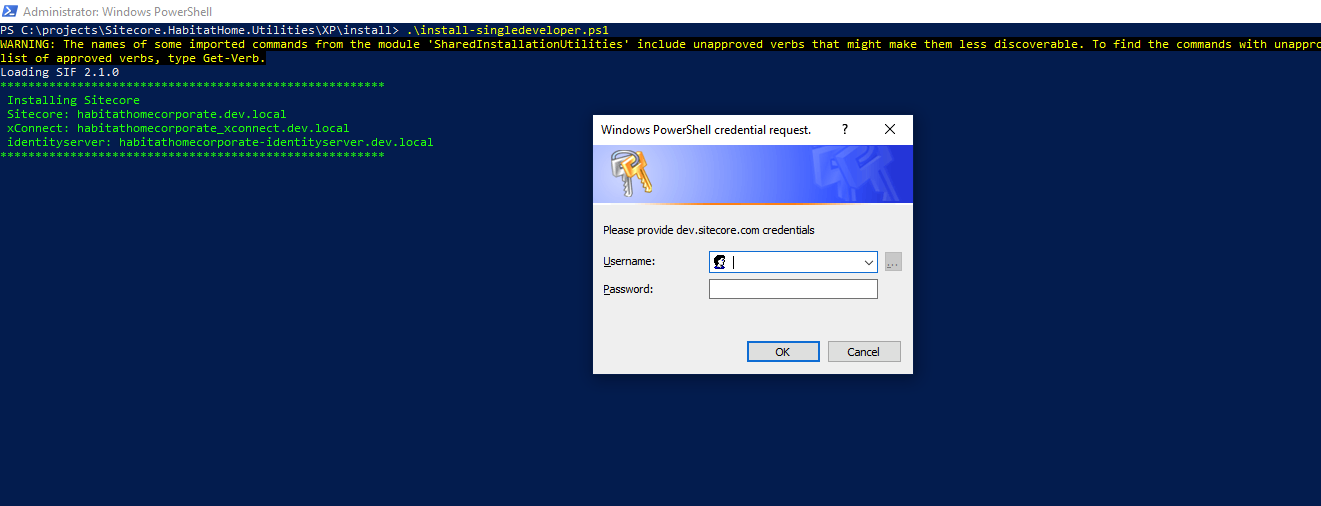
As you can see in the screenshot above, the Powershell script will automatically ask you to login with your Sitecore credentials of dev.sitecore.com, in order to download the Sitecore 9.2.0 rev. 002893 (WDP XP0 packages).zip to the \XP\install\assets folder. This might take a while. In the end the whole script will run for about 15 minutes
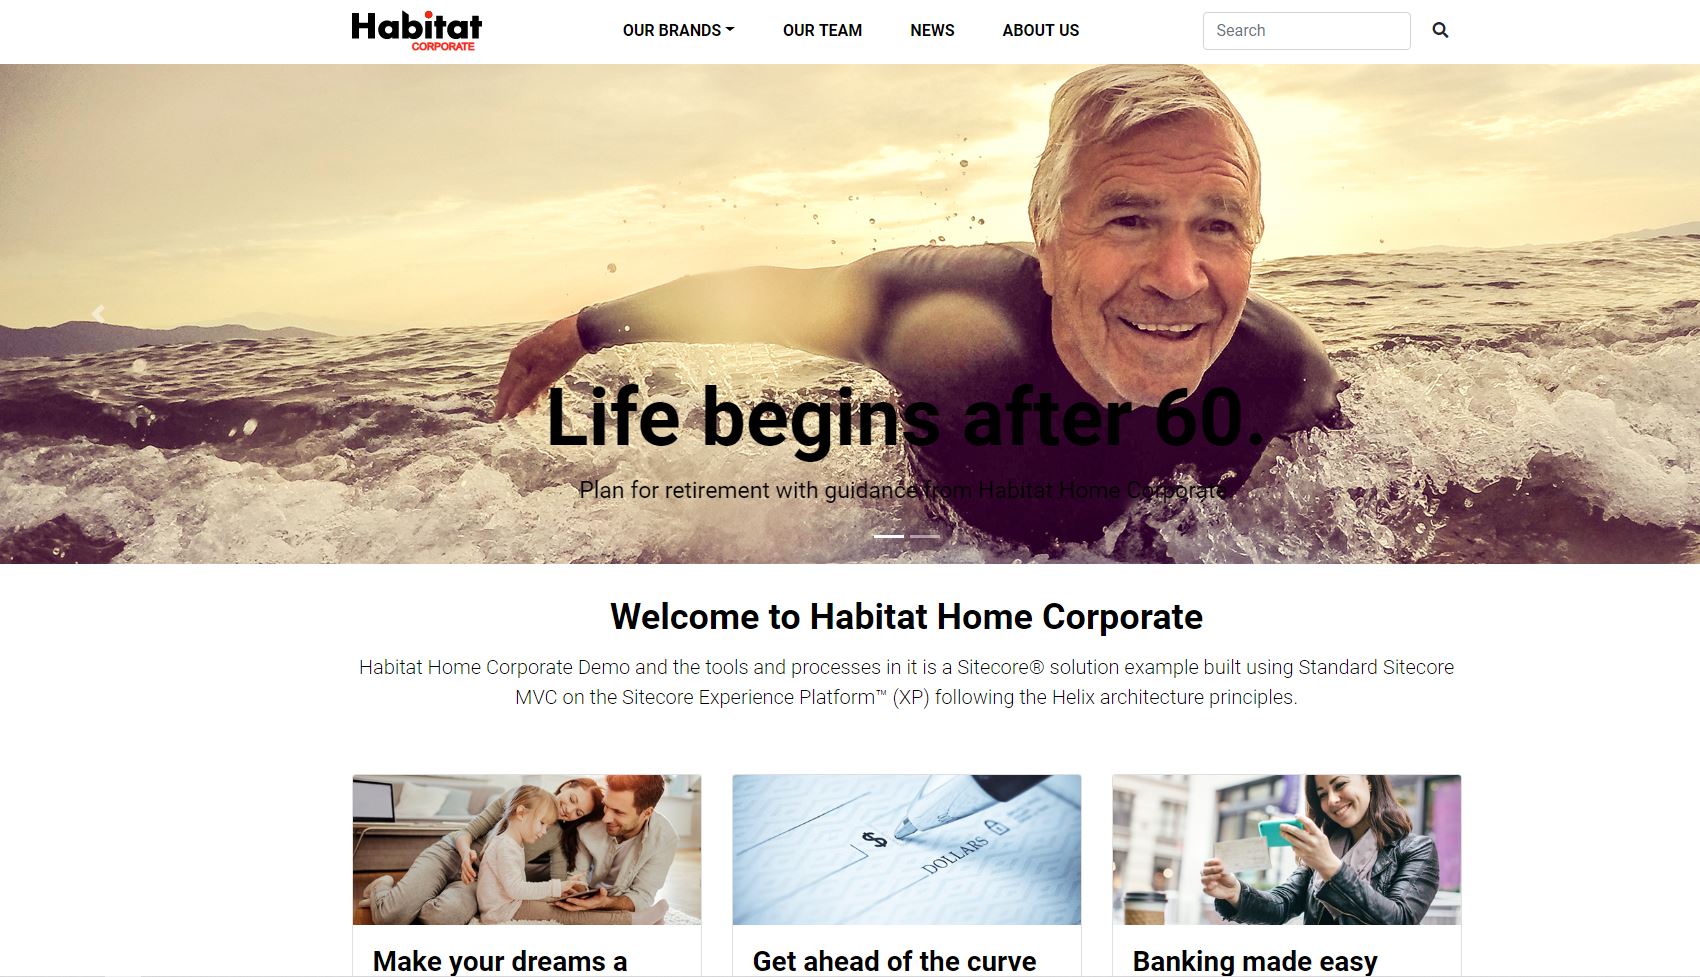
Head over to https://habitathomecorporate.dev.local to see that Sitecore 9.2 was installed correctly.
Sitecore HabitatHome Corporate installation second
The code for the custom Sitecore demo site: Habitat Home Corporate can be found on GitHub as well. So head over to GitHub and clone the repo to for example: C:\projects\Sitecore.HabitatHome.Corporate.
In Powershell head over to C:\projects\Sitecore.HabitatHome.Corporate and run the build.ps1 script. It will probably take around 3-4 minutes to get it installed.
Head over to https://habitathomecorporate.dev.local/sitecore, go to the Indexing Manager and rebuild all the indexes, since Habitat Home Corporate is using Content Search for functionality. Publish all content in all languages, since it’s a multi-language site.
And voila, we have Habitat Home Corporate up and running in around 20 minutes.
Happy Sitecoring …
–Robbert