The past couple of days I’ve been taken tiny steps in getting familiar with Sitecore JSS and have been writing up on a couple of small Sitecore JSS posts. All working in the end towards a Sitecore connected Vue.js app, even though working at the moment totally disconnected in the end it’s all about getting the Sitecore JSS powered Vue.js app running into Sitecore.
In order to be eventually be able to connect with Sitecore I wanted to take the necessary pre-requisites to already start exploring what I need to get Sitecore 9.1 up and running. One of the pre-requisites is SOLR.
Sitecore XP 9.1.0 supports SOLR, Lucene, and Azure Search as search providers, where SOLR is the default search provider and supports both content search and analytics search. From what we can see from the Solr compatibility table, is that SOLR 7.2.1 is the now the targeted version for XP 9.1
Java Runtime (JRE) install
In order to install SOLR 7.2.1, we first need to make sure that we have the Java Runtime (JRE) installed. If you haven’t already let’s install it though one of my favourite Software automation tools: Chocolatey
Chocolatey is a package manager for Windows which allows you do quickly automate software installations. I probably use it all the time when installing most of my applications that I use on a new VM. If you haven’t already installed it, make sure you install it here. Once installed make sure you open up a command prompt or Powershell prompt and run the following command:
- choco install javaruntime
This will make sure that the latest Java Runtime (JRE) gets installed on your local machine. With that in place we can start installing SOLR. But before we do that we have to check one more thing. Your JRE is usually installed at this location: C:\Program Files\Java. If you are unsure of your version, take a peek there and make sure you use that version in the SOLR script in the next part. Run the following command:
- java -version
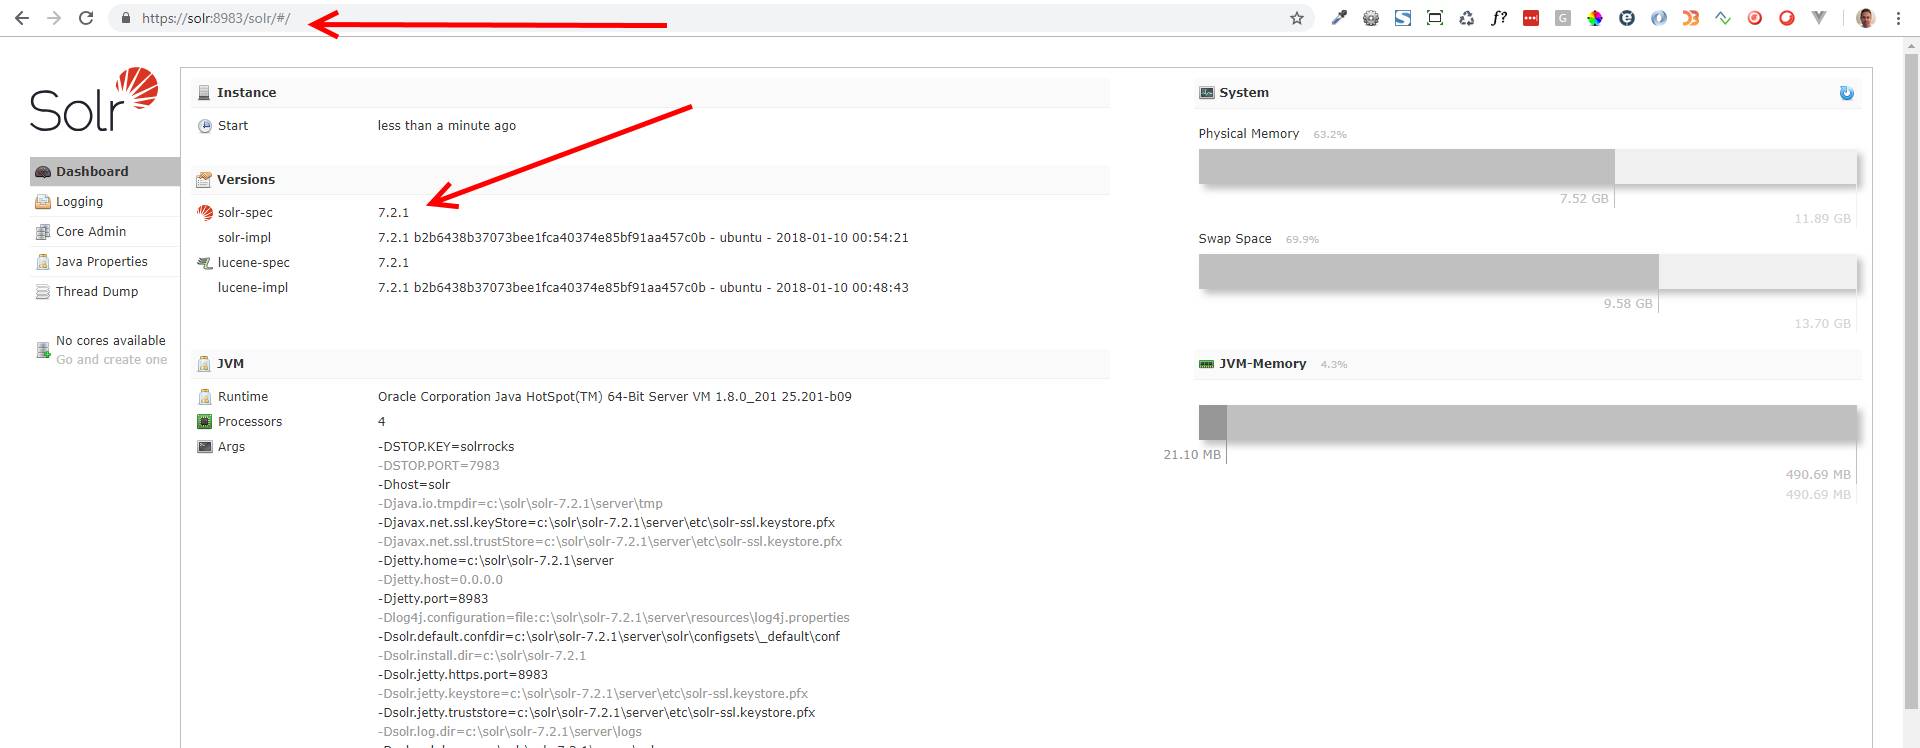
SOLR 7.2.1 install
Installing SOLR 7.2.1 locally isn’t hard at all if you know the right tools. But having to do it manually can be pretty hard. I’ve seen extensive posts on Sitecore 9.0 installations and Sitecore 9.1 installations. For example here (scroll to the Install Solr 7.2.1 & Enable SSL for SOLR (Self Signed Certificate) part).
But luckily for us the fantastic Jeremy Davis already provided us with a fantastic Low-effort SOLR Install script, but that was targeted at Solr 6.6.2, which was compatible with XP 8.2 and XP 9.0.
With some minor tweaks (basically adjusting the SOLR version and the Java Runtime we installed before), we are able to run 1 Powershell script to actually download SOLR 7.2.1, configure it and install it as SOLR as a service.
PowerShell execution policies
When I wanted to execute the powershell script on my brand new VM, I ran into security policy issues
PS C:\Projects\Kayee\Sitecore\sitecore-91-sif\SOLR 7.2.1> .\Install-Solr.ps1
.\Install-Solr.ps1 : File C:\Projects\Kayee\Sitecore\sitecore-91-sif\SOLR 7.2.1\Install-Solr.ps1 cannot be loaded because running scripts is disabled on this system. For more information, see about_Execution_Policies at https:/go.microsoft.com/fwlink/?LinkID=135170.
At line:1 char:1
+ .\Install-Solr.ps1
+ ~~~~~~~~~~~~~~~~~~
+ CategoryInfo : SecurityError: (:) [], PSSecurityException
+ FullyQualifiedErrorId : UnauthorizedAccess
PowerShell execution policies let you determine the conditions under which PowerShell loads configuration files and runs scripts. Being able to actually execute the powershell script I ran the following:
- Set-ExecutionPolicy Unrestricted -Scope LocalMachine
Then when I ran the updated version of Jeremy’s script (to be found here), SOLR 7.2.1 got installed and configured as a service.
When I was finished writing this blogpost, I found out that Bonny Nilsen already wrote something similar as well. Now you have more options on using the appropriate Install SOLR script
Happy Sitecoring …